3

DIY Sneaky Easter Eggs

Wednesday, April 1, 2015

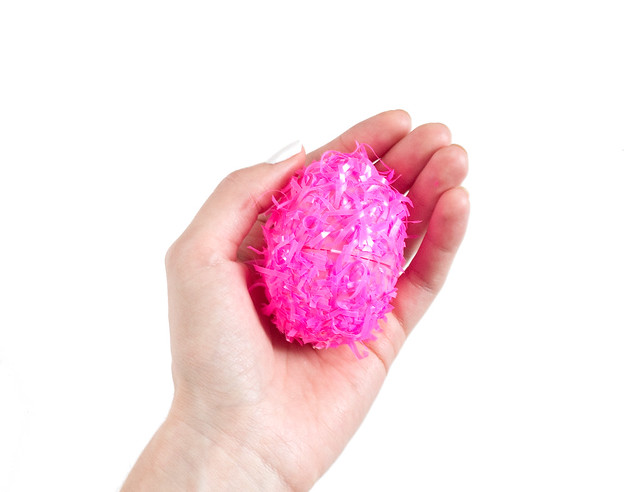
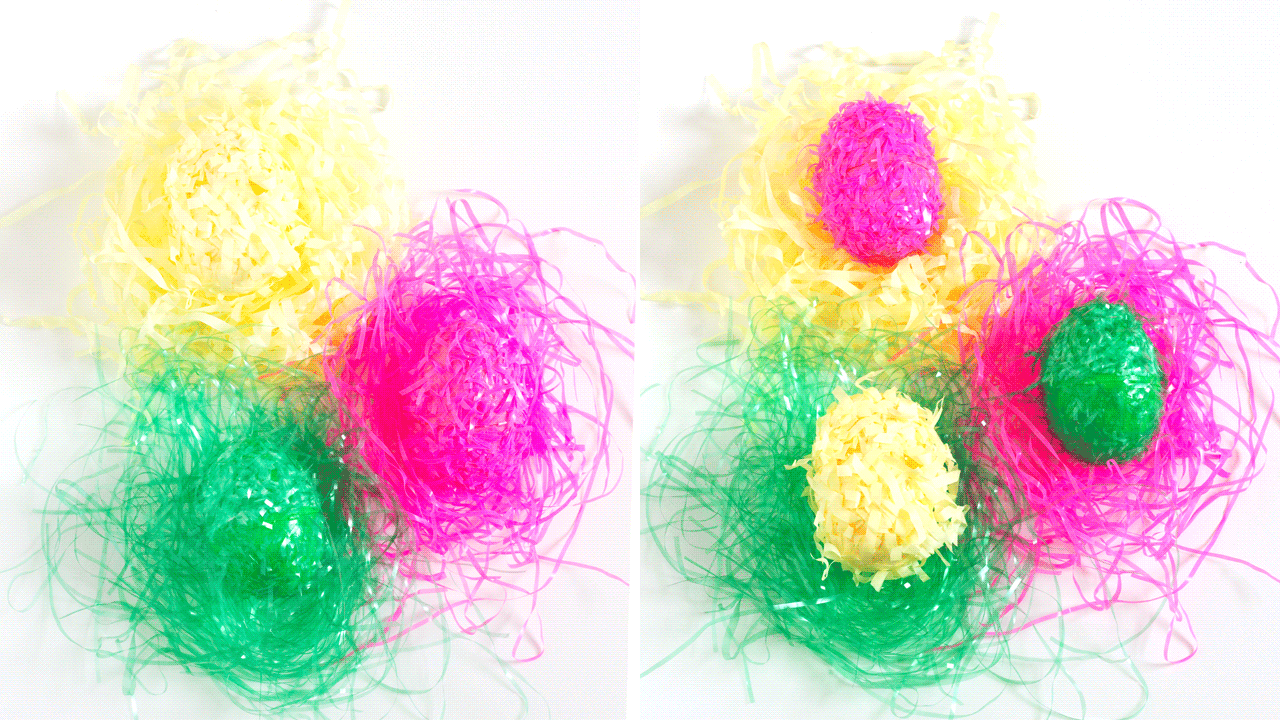
DIY Sneaky Easter Eggs With Easter so close to April Fool's Day this year I thought it would be fun to come up with a little practical joke from the Easter Bunny. These eggs will practically disappear in the Easter basket because of their funny Easter grass camouflage. They're cute on their own, too, almost like colorful cocoanut macaroons, in egg form.

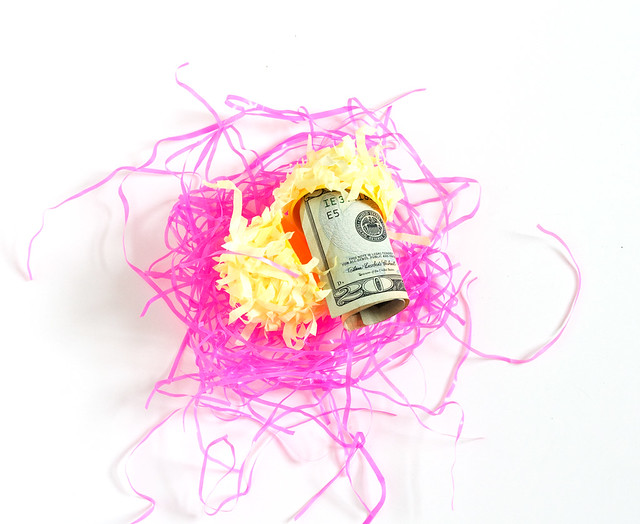
I used Easter grass (basket filler) for this project, but you could use real grass clippings instead for outdoor egg hunts. It would be perfect for older kids and adults who are looking for an extra challenge. Hide the best prizes in the camouflaged eggs!

Here's what you'll need:
DIY Sneaky Easter Eggs
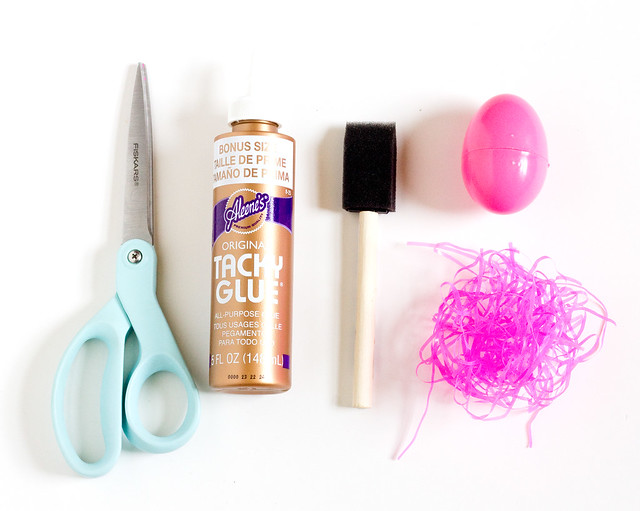
  • Easter grass - I used opaque pink, transparent green, and yellow paper grass
  • Plastic eggs in the same colors as the grass
  • Thick glue - I used Tacky Glue but regular white glue would work, too
  • Foam brush
  • Scissors
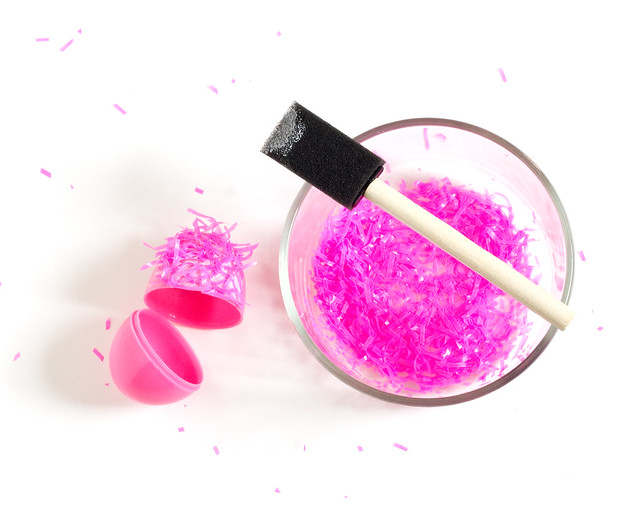
Grab a handful of grass and trim it into a bowl. Cut varying sizes with the largest about 3/4" long.
Open up an egg and brush the glue onto one side. Lay it in the bowl of the grass trimmings and cover all of the exposed glue. Repeat with the other side of the egg, making sure not to get glue on the seam. Let dry.
DIY Sneaky Easter Eggs
That's it! Fill them with prizes and hide them in Easter baskets. I had to take pictures of them on different colored grass because they blended in so well they practically disappeared!
DIY Sneaky Easter Eggs

DIY Sneaky Easter Eggs

DIY Sneaky Easter Eggs

Cute, clever, and so easy! I know my 6 year old niece will get a kick out of these on Easter. I hope you'll make a few! Happy April Fool's Day!

305

DIY Pysanky Easter Eggs

Saturday, April 23, 2011

DIY Pysanky Style Easter Eggs
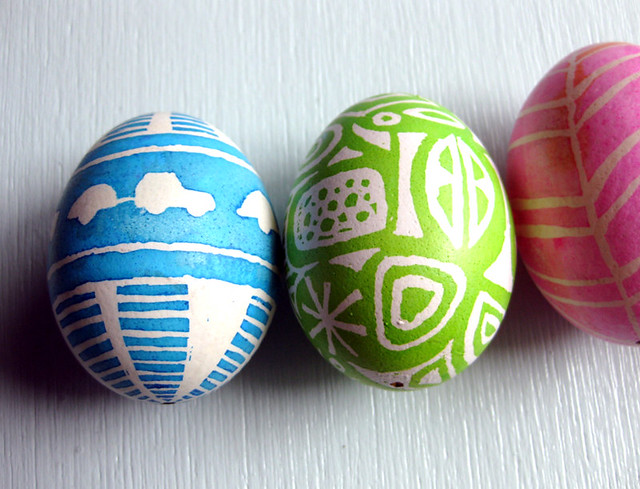
Easter isn't Easter without crafts. I'd like to share the project I did this year: Ukrainian eggs, also known as Pysanky. I've been meaning to try out this technique for a few years now so I was very excited to finally get a chance. A local art store had all the supplies I needed: a kistka (a small brass funnel on a handle), and a little square of beeswax. Add a little dye for the eggs and that's it!

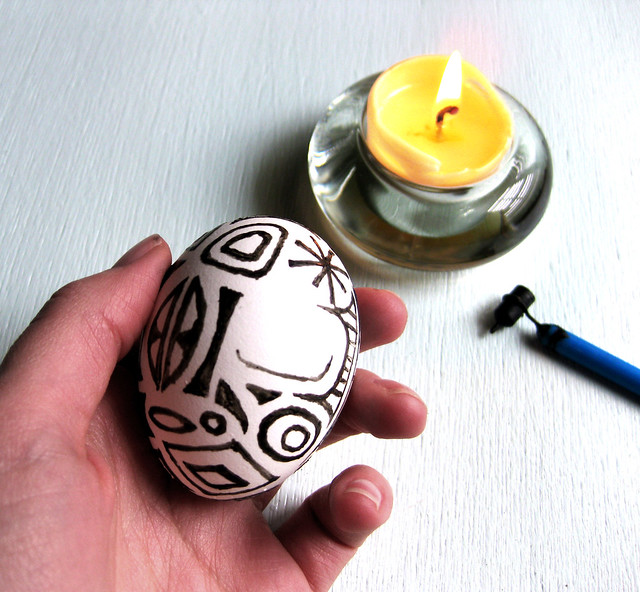
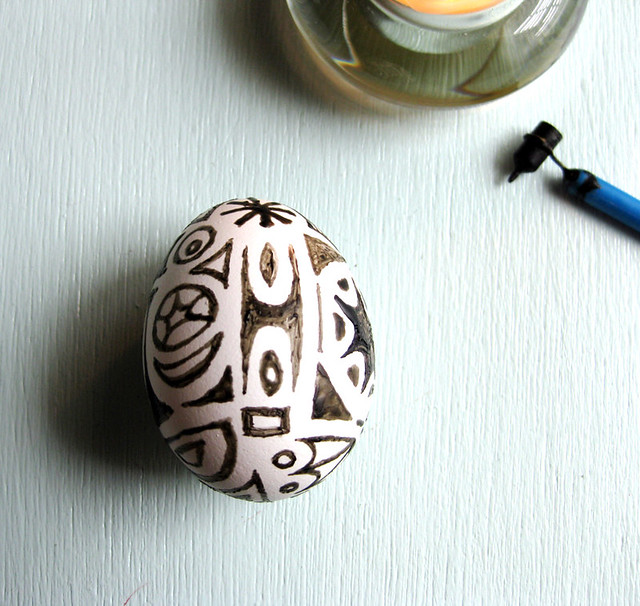
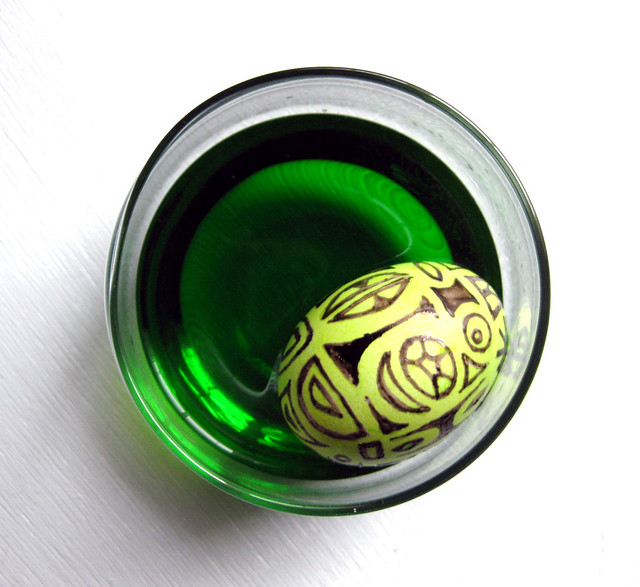
The first step was to blow out the eggs. I did this the old fashioned way - with one hole on the top and bottom of each egg and lung power. After that, I heated the kistka over a candle flame, scooped up a tiny bit of the beeswax, and started drawing directly on the egg shell. With this technique, everything you draw will eventually be white (or whatever your base color is), so it's a reverse design.

DIY Pysanky Style Easter Eggs DIY Pysanky Style Easter Eggs

I filled in this egg with retro-style designs. The egg is entirely covered and ready for the dye!
DIY Pysanky Style Easter Eggs DIY Pysanky Style Easter Eggs

I couldn't resist doing a Mini Cooper and trailer design on one of the eggs. :) After the dye is completely dry, I held the egg over the side of the candle flame to melt the wax. Do this one small section at a time, and wipe the melted wax off with a paper towel as you go.
DIY Pysanky Style Easter Eggs

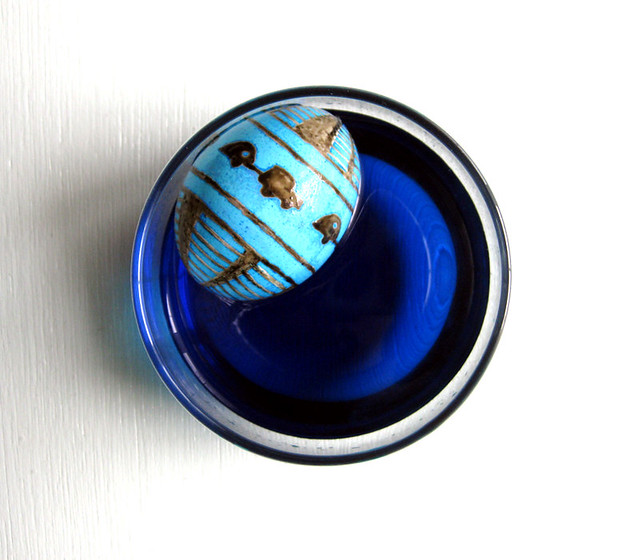
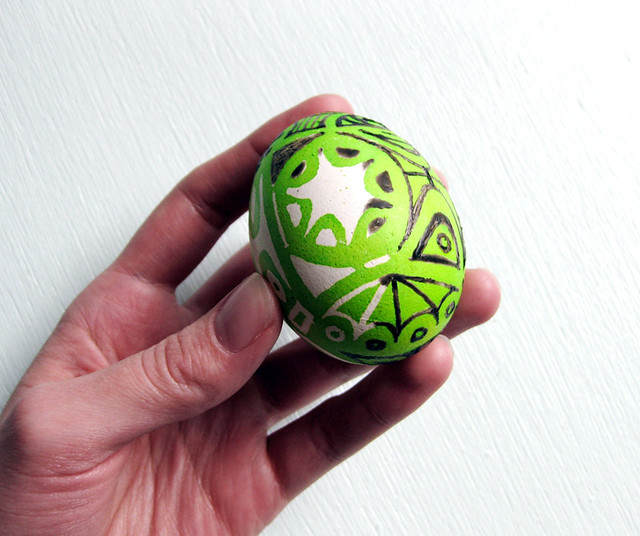
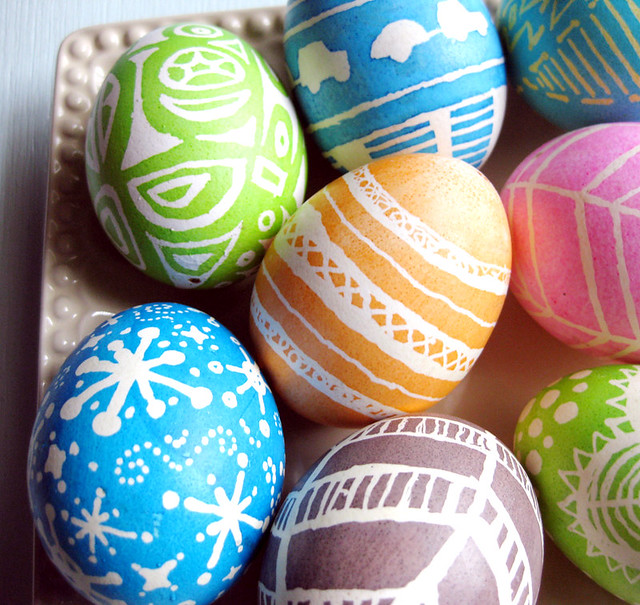
The white design is almost completely revealed. It was exciting to see the crisp white coming through from under the dark wax. Applying the wax can be time consuming, depending on the complexity of the design, but revealing the design at the end is very satisfying! Because of this, the whole process can be a little addicting. Traditional Ukrainian Pysanky use many layers of color and wax, eventually resulting in an elaborate design in a rainbow of colors. I just did one or two dye colors this time. Try dying a light colored base coat before applying the designs.
DIY Pysanky Style Easter Eggs DIY Pysanky Style Easter Eggs DIY Pysanky Style Easter Eggs

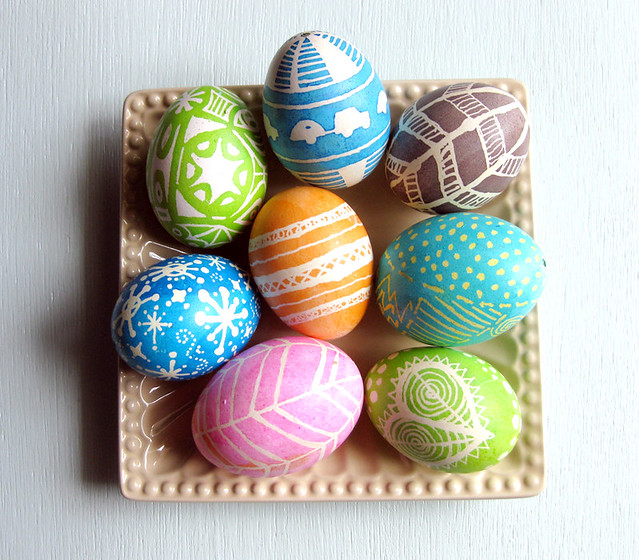
Here's my collection. These were so much fun to make and I'm sure they will be part of my Easter decor for many years. Happy Easter, everyone!

14

DIY Mini Easter Dome

Monday, March 31, 2014

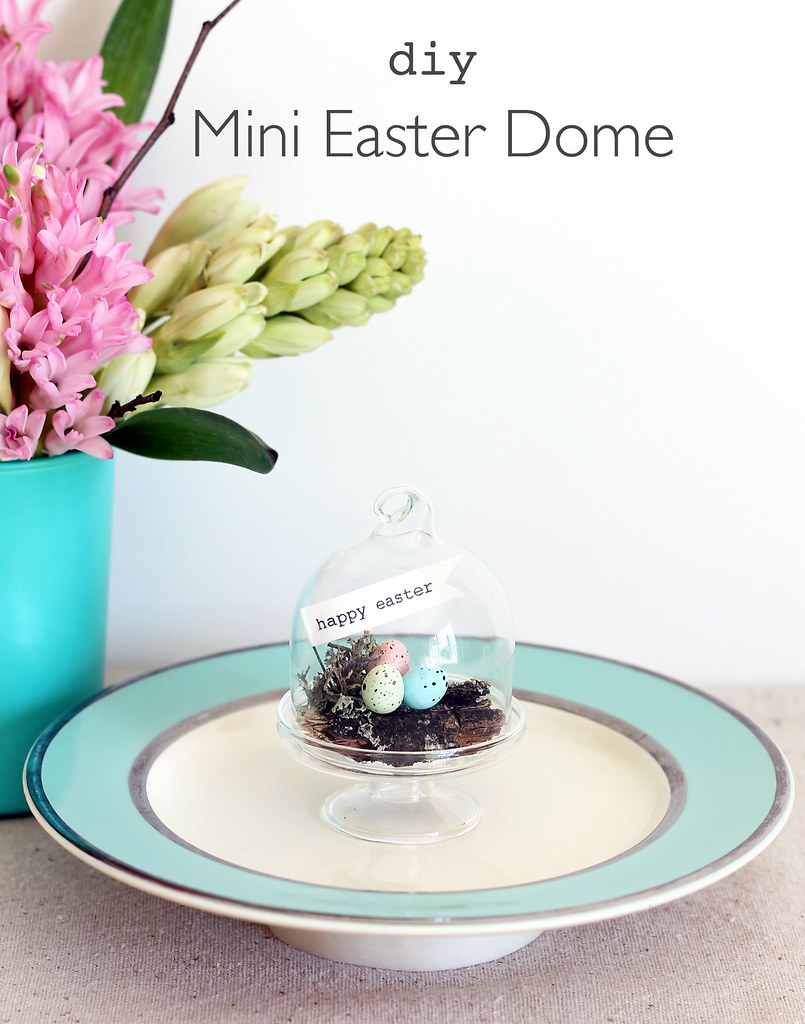
DIY Mini Easter Dome
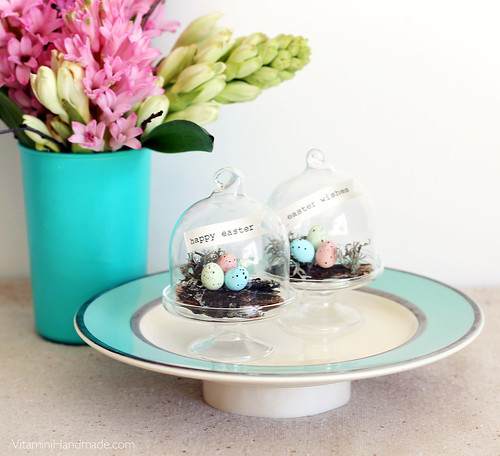
There's just something about miniature nature scenes that just say "Easter!" to me. As a kid I was enthralled with my grandma's collection of sugar eggs. You know the ones, with hard as rock frosting decorations on the outside and a little viewing window. I loved looking at the little scenes inside those eggs. On one of my recent wandering trips around Michael's recently, I came across these little glass domed plates and thought they'd be perfect for a mini Easter display.

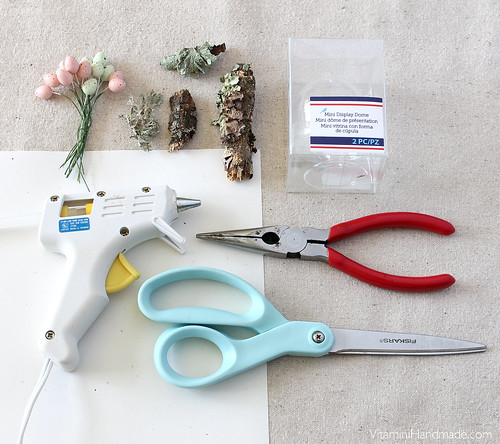
Here's what you'll need:

DIY Mini Easter Dome
  • Mini Display Dome found at Michael's
  • Mini speckled eggs. I found a bunch of pink and green eggs at Michael's. Similar  
  • Moss or lichen. I found mine on the ground after a windstorm, but you can buy bags of moss in the floral section at the craft store
  • Sticks, twigs, and small pieces of bark. Again, foraged during an afternoon walk.
  • Parchment colored paper
  • Hot glue gun
  • Scissors
  • Pliers to trim wire
DIY Mini Easter Dome

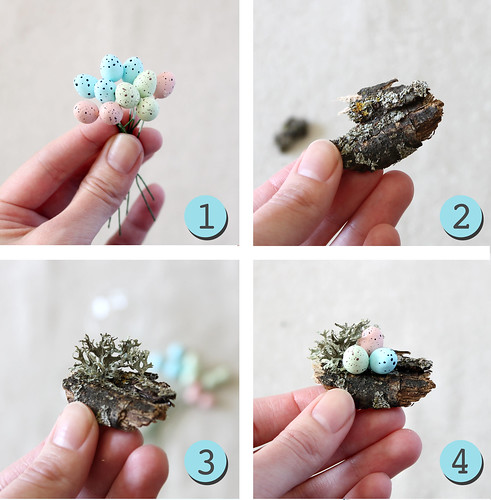
1. Optional: Paint a few of eggs with acrylic paint for more color variety (I painted the blue ones). Add some speckles with black or brown paint and a toothpick.
2. Break off a few small pieces of bark and glue them together to make a little raft-like shape. Make sure it's small enough to fit inside the lid of the dome.
3. Glue on a few small pieces of moss.
4. Clip the wires off of the mini eggs and hot glue them onto the raft.

DIY Mini Easter Dome

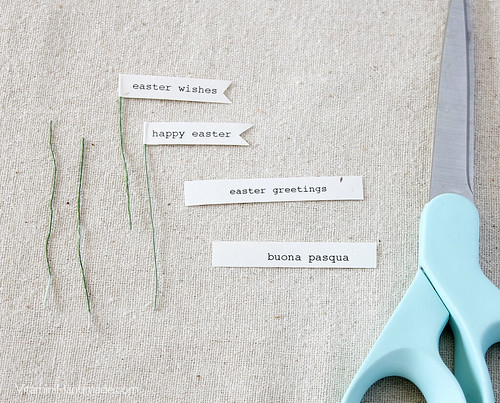
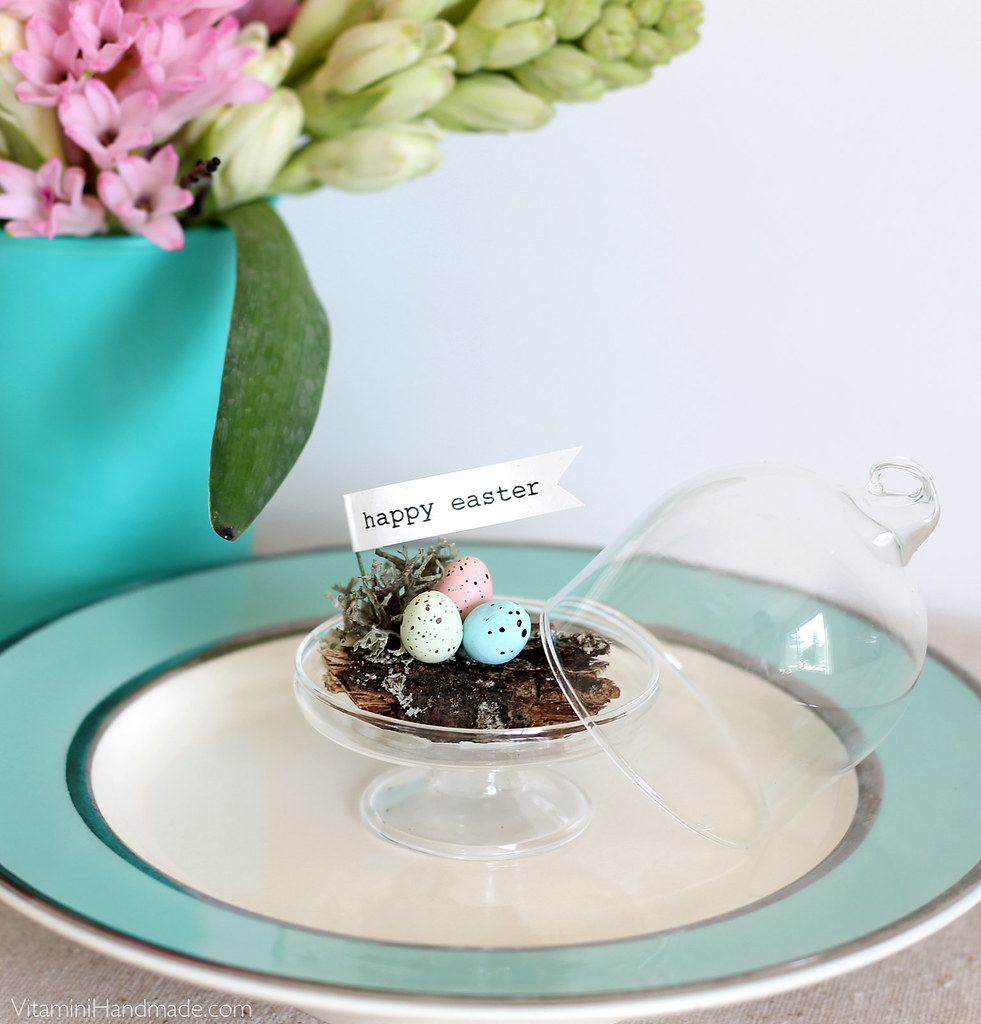
To make the little flags, hand write, stamp, or print out your Easter messages. I typed out a few in a simple font and printed them on a natural toned speckled piece of paper. Cut messages to size, leaving an extra 1/2 inch on the left side. Add a little bit of glue to a piece of wire (just trimmed from the eggs) and fold the flag around it.

DIY Mini Easter Dome

Once the flag is dry, trim the wire to size, about 1" tall. Experiment with placement in the arrangement. It is important to attach it to the left side of the raft so the entire paper fits inside the dome. Once you've found a good spot for it, add a dab of hot glue to the end and secure at an angle behind the eggs.

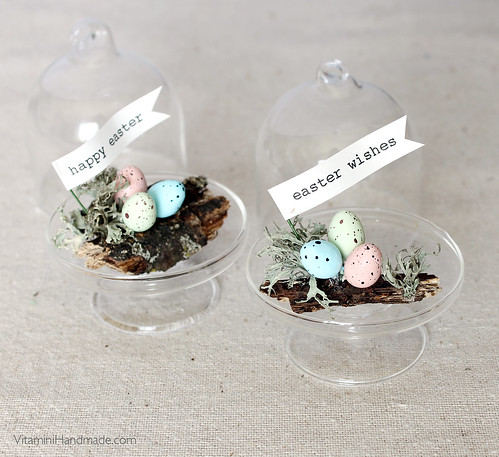
Glue the arrangement to the bottom of the plate with some hot glue. Add the dome over the top. Add a couple dots of hot glue to secure the lid to the base if you'd like.

DIY Mini Easter Dome

How cute are these? You can add another layer of personalization by tying on a little flag with a name to the top of the lid. Wouldn't they make the sweetest little place cards for Easter dinner?

DIY Mini Easter Dome DIY Mini Easter Dome

29

DIY Marbled Paper Mache Easter Eggs

Tuesday, April 8, 2014

DIY Marbled Paper Mache Easter Eggs

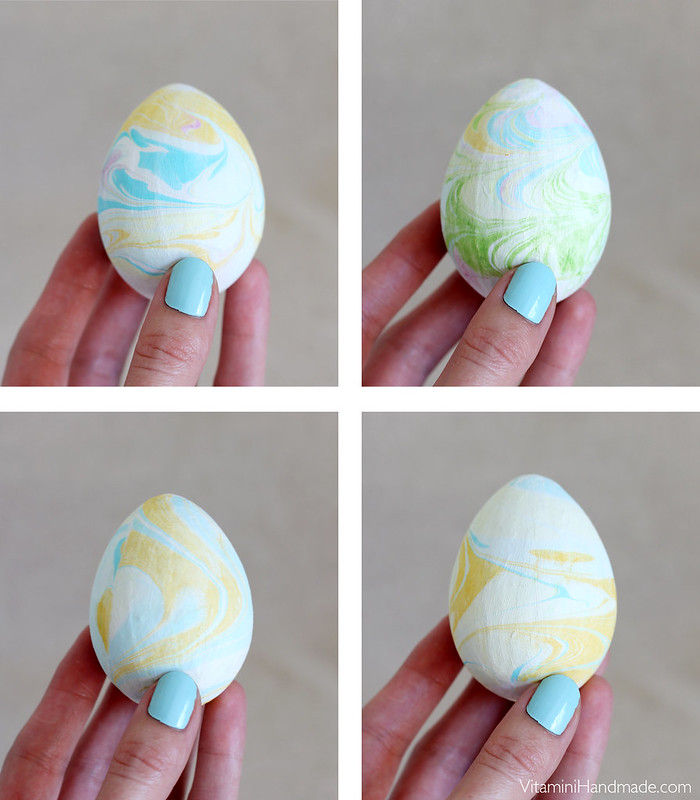
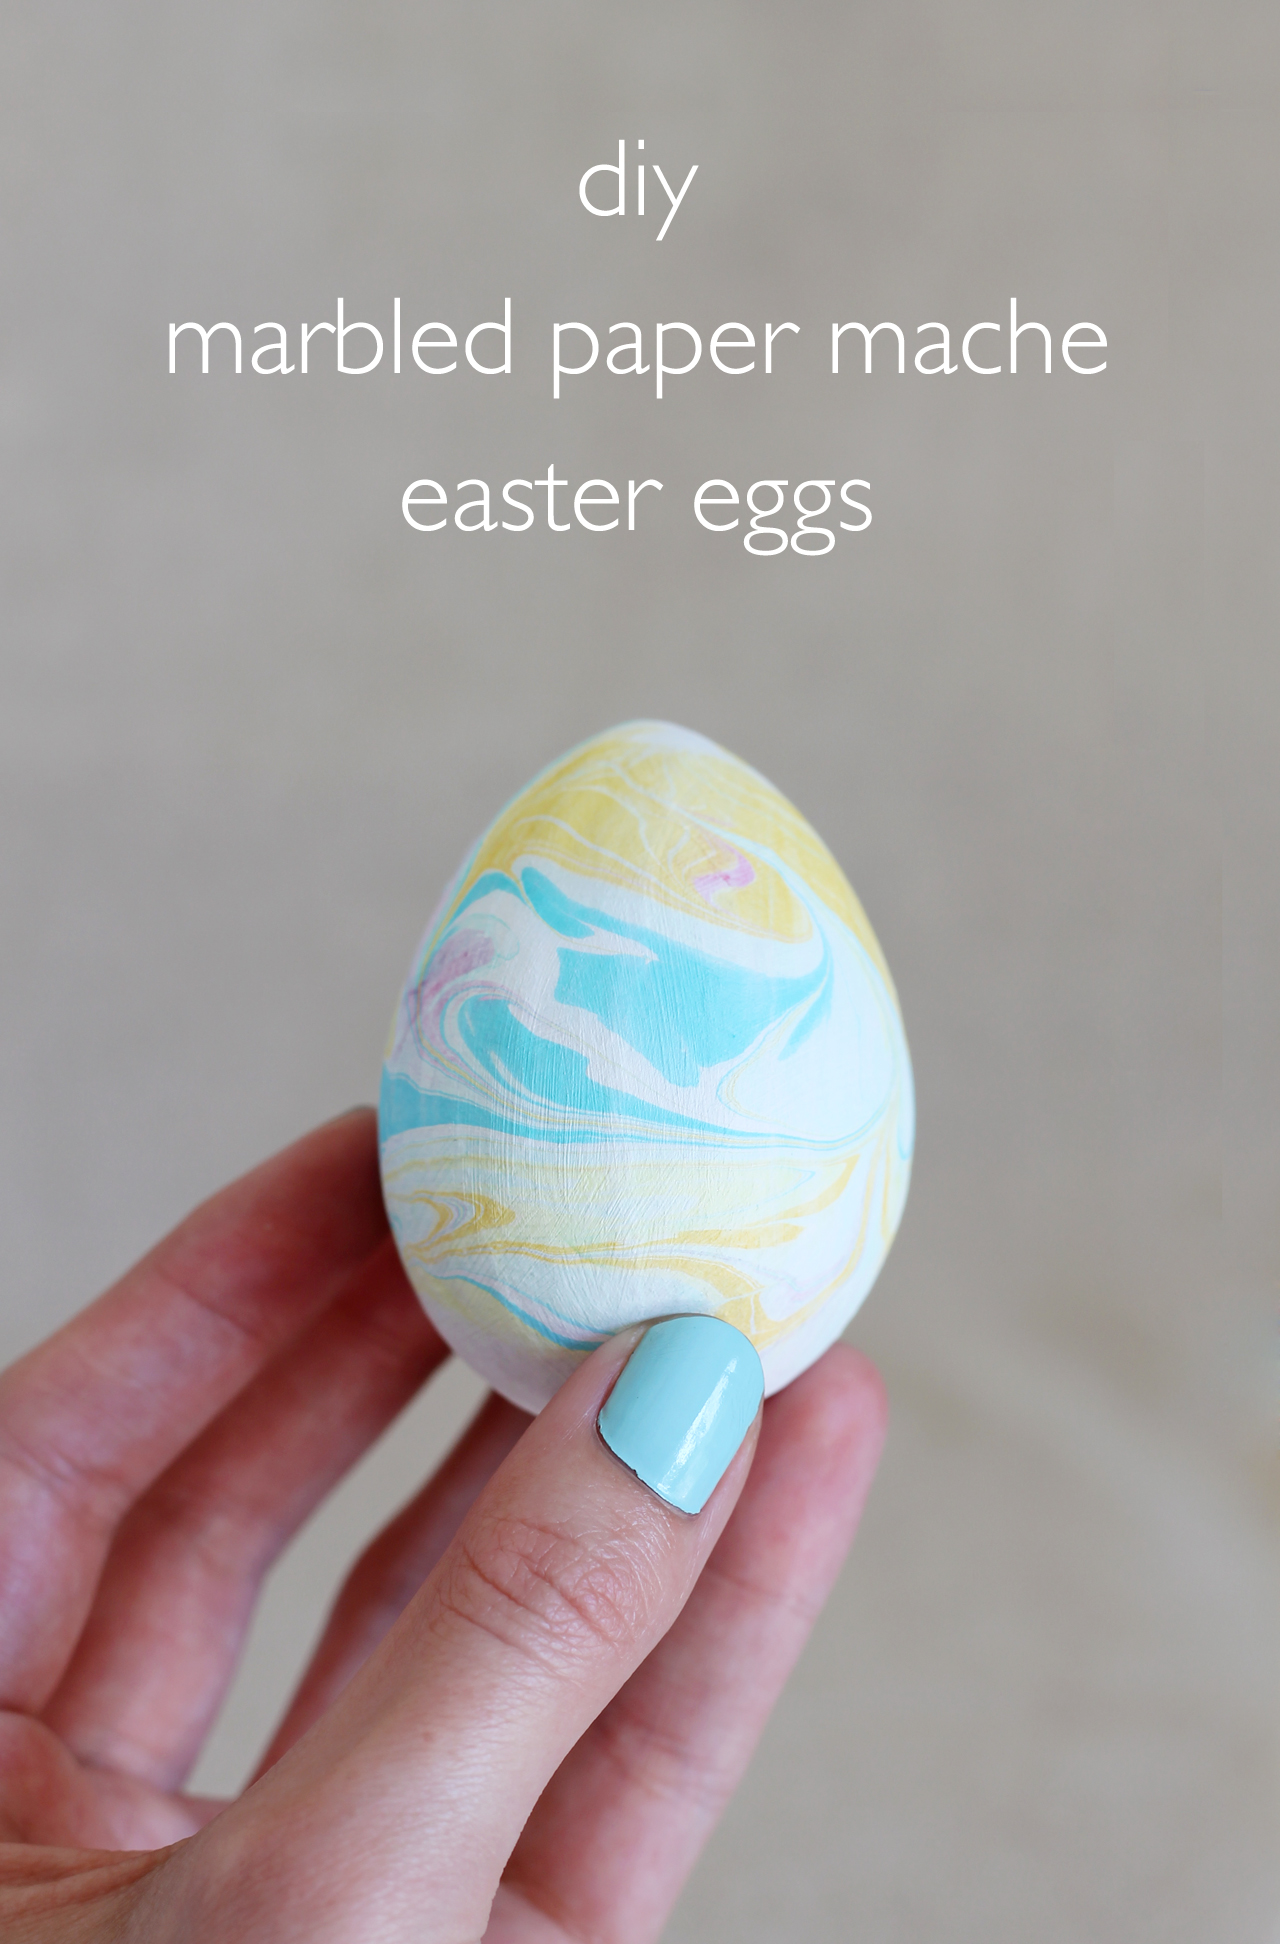
I have fond memories of marbling Easter eggs with my grandma every year as a kid. She wasn't big on craft projects, but she always had a Paas Marble Kit ready for my sisters and me a couple weeks before Easter. I thought of her when I decided to marble some eggs this year. This time, however, I used traditional marbling supplies and techniques on paper-mache eggs so that I can enjoy them for many years.

This technique is time consuming and a little messy, but I'm sure you'll enjoy both the process and the results once you get going.
DIY Traditionally Marbled Paper Mache Eggs

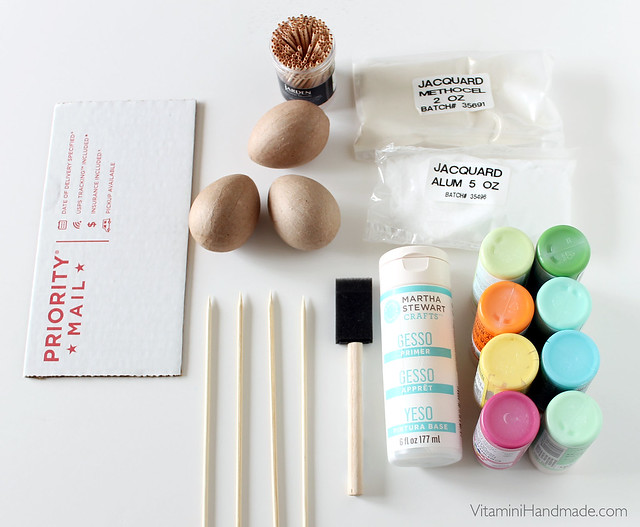
Here's what you'll need:
  • Powdered Alum and Methocel. This Jacquard Marbling Kit comes with both in addition to some primary color paints (that I didn't use).
  • Acrylic pants in various spring-time colors
  • Paper Mache Eggs
  • Gesso Primer or white acrylic paint
  • Foam brush
  • Bamboo skewers
  • Toothpicks
  • Cardboard scraps
Not shown: large mixing bowl, mixer, shallow tray or pan (about 2" deep), scrap papers, distilled water, household ammonia, small containers, drop cloth or newspapers to protect your work surface.
DIY Traditionally Marbled Paper Mache Eggs
Prep:
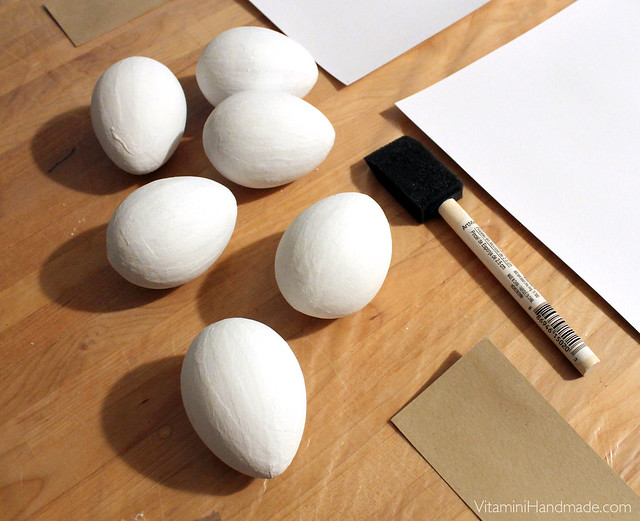
Prime the eggs with the gesso or white acrylic paint and the foam brush. Let dry. Mix the Alum with water per package instructions. Brush a light coat of the alum mixture on the eggs. The alum prepares the surface of the eggs to accept the marbled paint, so this step is very important. Let dry.

Mix the methocel with distilled water according to package instructions. I halved the batch indicated on the package and used 1/2 gallon of water to 2 tbs methocel powder. Mix with a mixer for 5 minutes to dissolve as much of the methocel as possible. Add 1/2 tablespoon of household ammonia to help dissolve the rest of the methocel. The mixture will be clear when it's fully mixed. Slowly pour into the shallow tray and let sit for at least 30 minutes or until all of the bubbles have dispersed.
DIY Marbled Paper Mache Easter Eggs
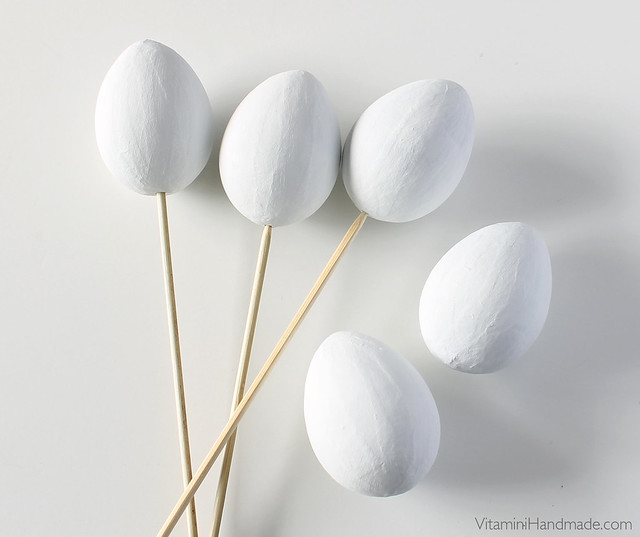
While you wait, carefully push the skewers into the base of the eggs. Cut a small X on the bottom of each egg with a craft knife to make it a little easier.
DIY Marbled Paper Mache Easter Eggs

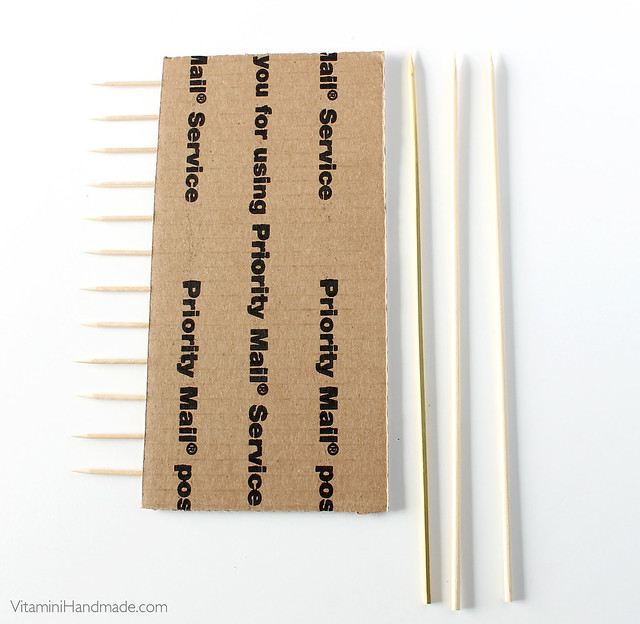
Make a rake by poking toothpicks into the end of a piece of cardboard at a regular interval.

Dilute each acrylic paint color in a small container with a little bit of water. The paints should be about as thick as whole milk.

Marbling (the fun part!):
After the 30 minutes, scrape the top of the tray with a piece of paper (like skimming the top of a swimming pool) to remove dust and bubbles. Dip a skewer into the first paint color and flick it over the tray. The paint droplets will settle on the surface and spread. Continue with other colors in a random pattern.
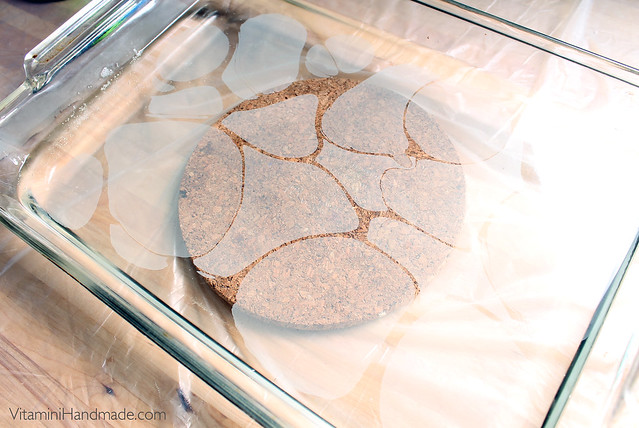
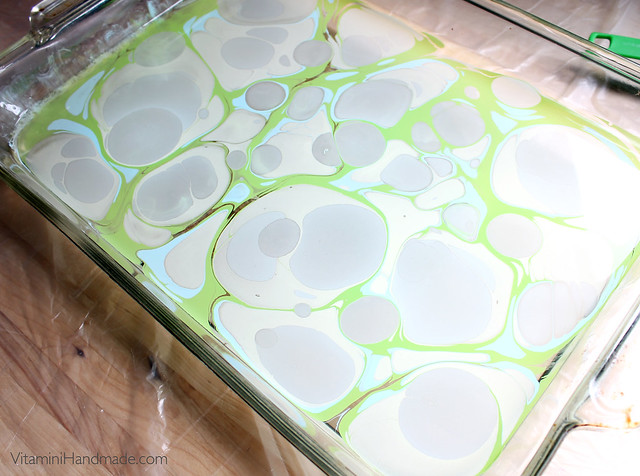
DIY Marbled Paper Mache Easter Eggs DIY Marbled Paper Mache Easter Eggs

Use a skewer or the toothpick rake to swirl the paint colors in a pattern that you like. Slowly roll the egg across the surface of the paint to pick up the pattern. Rinse carefully with water to remove the methocel. Let dry vertically on the skewer in a jar or mug.
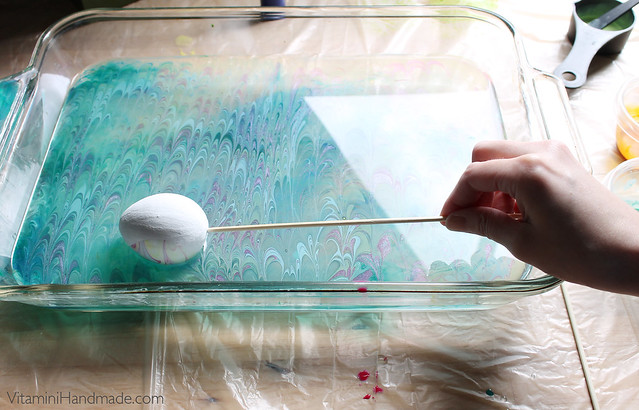
DIY Marbled Paper Mache Easter Eggs

Repeat the steps with each egg. To start a new pattern or color combo, lay a piece of scrap paper on the surface and carefully lift off to remove excess paint. Start over with the same steps. Play with different color layers and swirl patterns.

Tips:
It's best to start each batch of color/pattern with a clean methocel surface. Residual paint may affect the color and pattern of the next application of paint.
Bright paint colors work the best. Light shades of pink, light blue, and light yellow won't show up as well as more saturated colors.
If the paint sinks to the bottom of the tray instead of staying on the surface it is too thick. Dilute with more water until it spreads across the surface. If the paint sinks it will not affect the color/pattern.
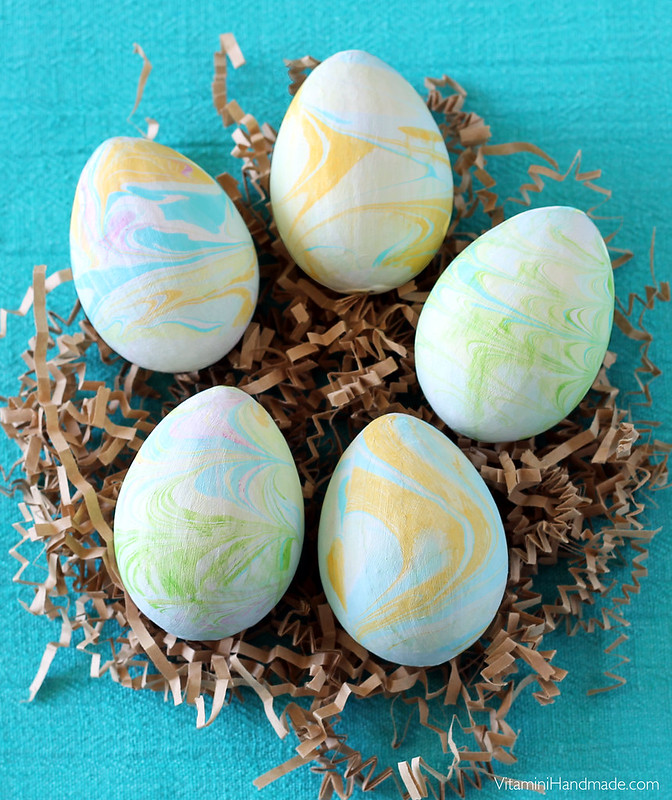
DIY Marbled Paper Mache Easter Eggs DIY Marbled Paper Mache Easter Eggs

Cleanup:
Cover the methocel to re-use later! It will keep up to a week at room temperature, longer if refrigerated. If you're done, pour it into a can or milk carton and discard. The package instructions said it can be poured down the drain if flushed with hot water, but I also heard that it can clog drains, so I played it safe. Save the alum, too, and treat other papers or fabric pieces to prep for marbling.

DIY Marbled Paper Mache Easter Eggs

I had so much fun with this technique. Have you ever tried traditional marbling? If you want to read more about marbling and its history, Design Sponge has an informative article all about it. (I just located this post and thought, "Hmm, I wonder if I commented on this when it was posted last year." Sure enough, I got the first comment spot. Too funny.)

Let me know if you try this. I'd love to see how your Easter eggs turn out!

*If you follow me on Instagram or Twitter you may have noticed my many posts about Craftcation. I got back late last night and am so inspired for my blog and handmade business. I'm going to share a post all about it later this week, so stay tuned!

81

DIY Origami Bird's Nest with Free Printable

Monday, April 14, 2014

DIY Easter Origami Bird's Nest | Click through for the tutorial and free printable!
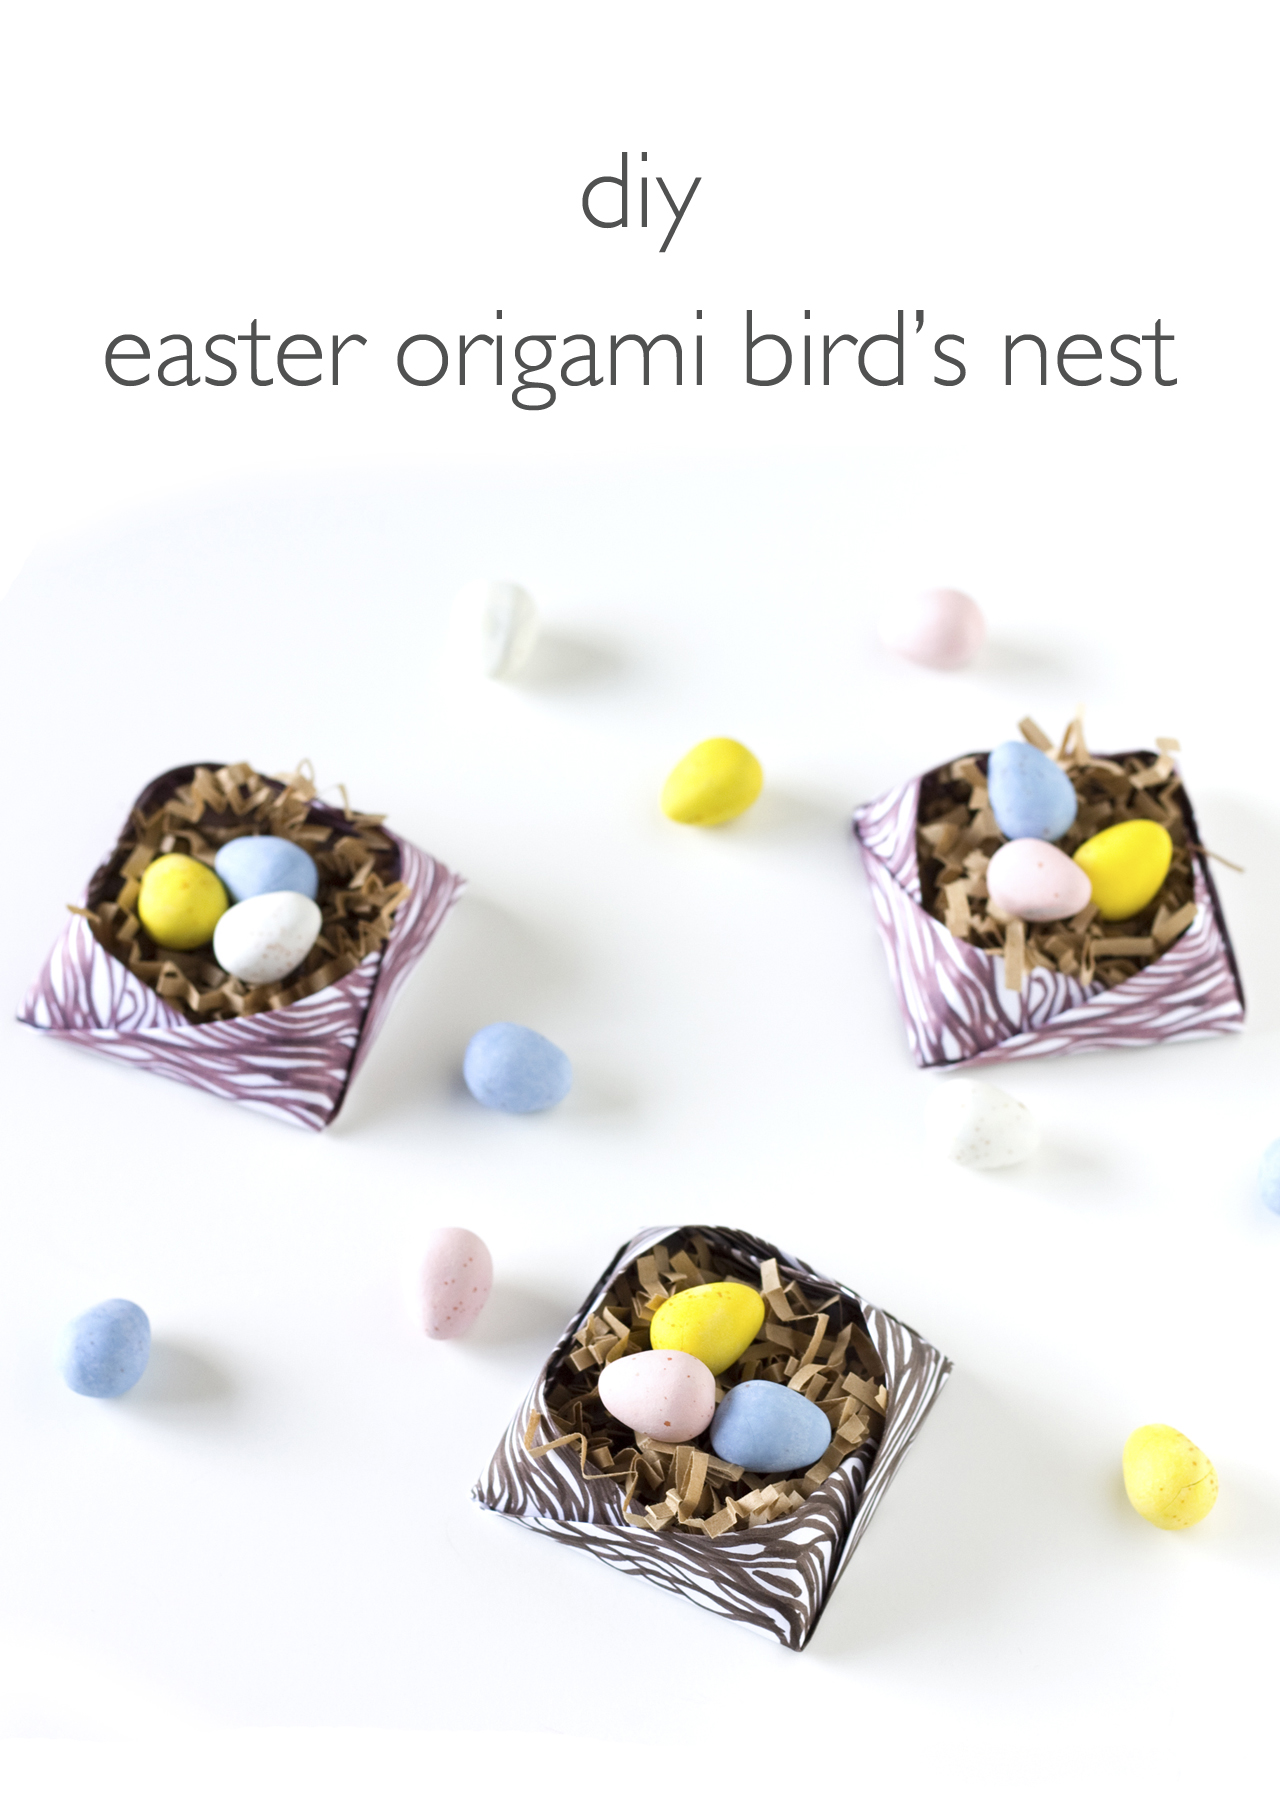
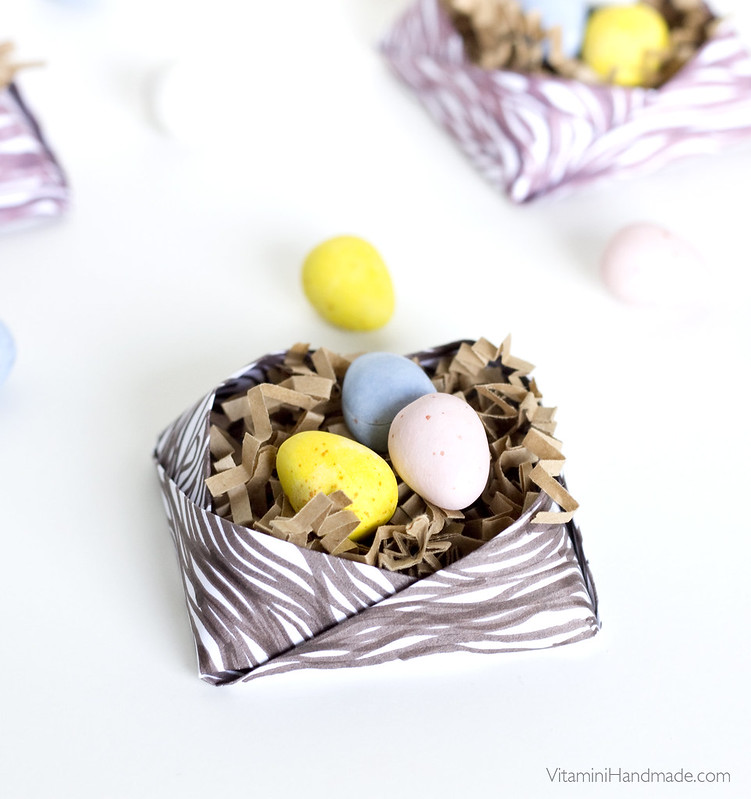
There's still time to whip up a few handmade decorations for your Easter bash this coming Sunday! I transformed this simple origami box into a little bird's nest that's just perfect for those Cadbury Mini Eggs that we've all been snacking on since Valentine's Day saving for Easter.

I didn't have any nesty-looking paper for this, so I drew up my own. Click here to download it for yourself! 

Here's what you'll need:

DIY Easter Origami Bird's Nest | Click through for the tutorial and free printable!

  • Nest filler - crimped paper or Easter basket grass
  • Egg-shaped candies
  • Free download, print out at 100% scaling and trim to 6" square

With the printed side down, fold in half diagonally, both sides.

Fold the right paper edge to the center crease, folding only to the lower crease. Fold the corner of this flap upwards. Unfold. Repeat with the three other sides of the square.

Bring the folded edge points to the center of the square. Tuck the corners into each other. Crease the edges into a square shape. Follow along with the video!

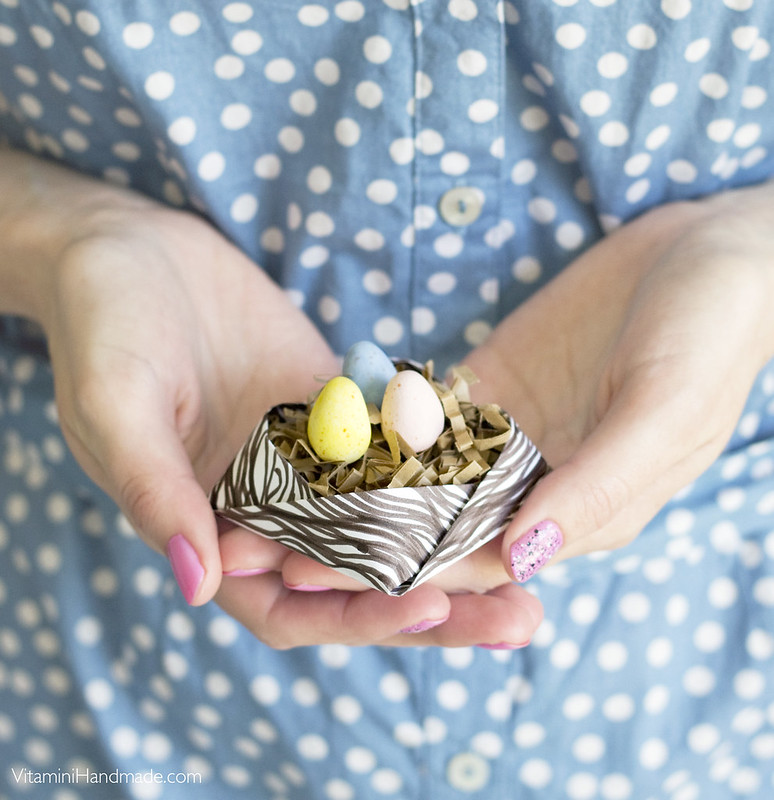
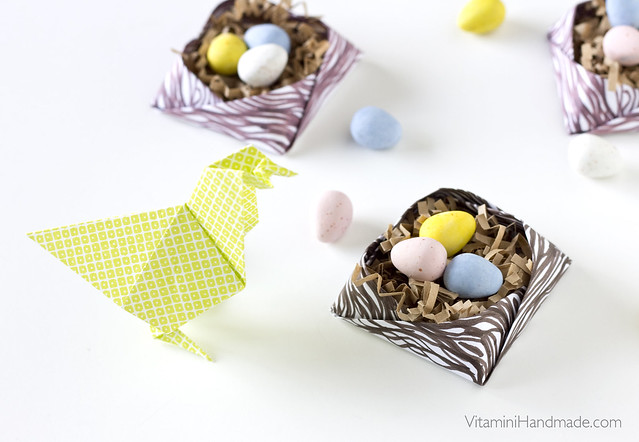
Fill with crimped paper and candy eggs. Make a bunch to give to friends and coworkers!

DIY Easter Origami Bird's Nest | Click through for the tutorial and free printable! DIY Easter Origami Bird's Nest | Click through for the tutorial and free printable!

Fold an origami hen or two to go with your nests!

DIY Easter Origami Bird's Nest | Click through for the tutorial and free printable!

Origami project adapted from Advanced Origami. Check it out for more origami models.
The download provided is not for distribution and is for personal use, only.

5

Happy Easter!

Friday, April 3, 2015


Happy Easter to you, my friends! I've been catching up on work this week and also trying to get over a cold, so I'll be taking it easy and eating lots of candy. :)

If you're looking for a last minute project, I have lots of good ones in the archives! See all of the Easter DIYs from years past right here.

*Photo of Mary Tyler Moore surrounded by bunnies via Mitch O'Connell

18

DIY Marbled Paper & Fabric

Friday, May 16, 2014

DIY Marbled Paper and Fabric | click through for the tutorial!

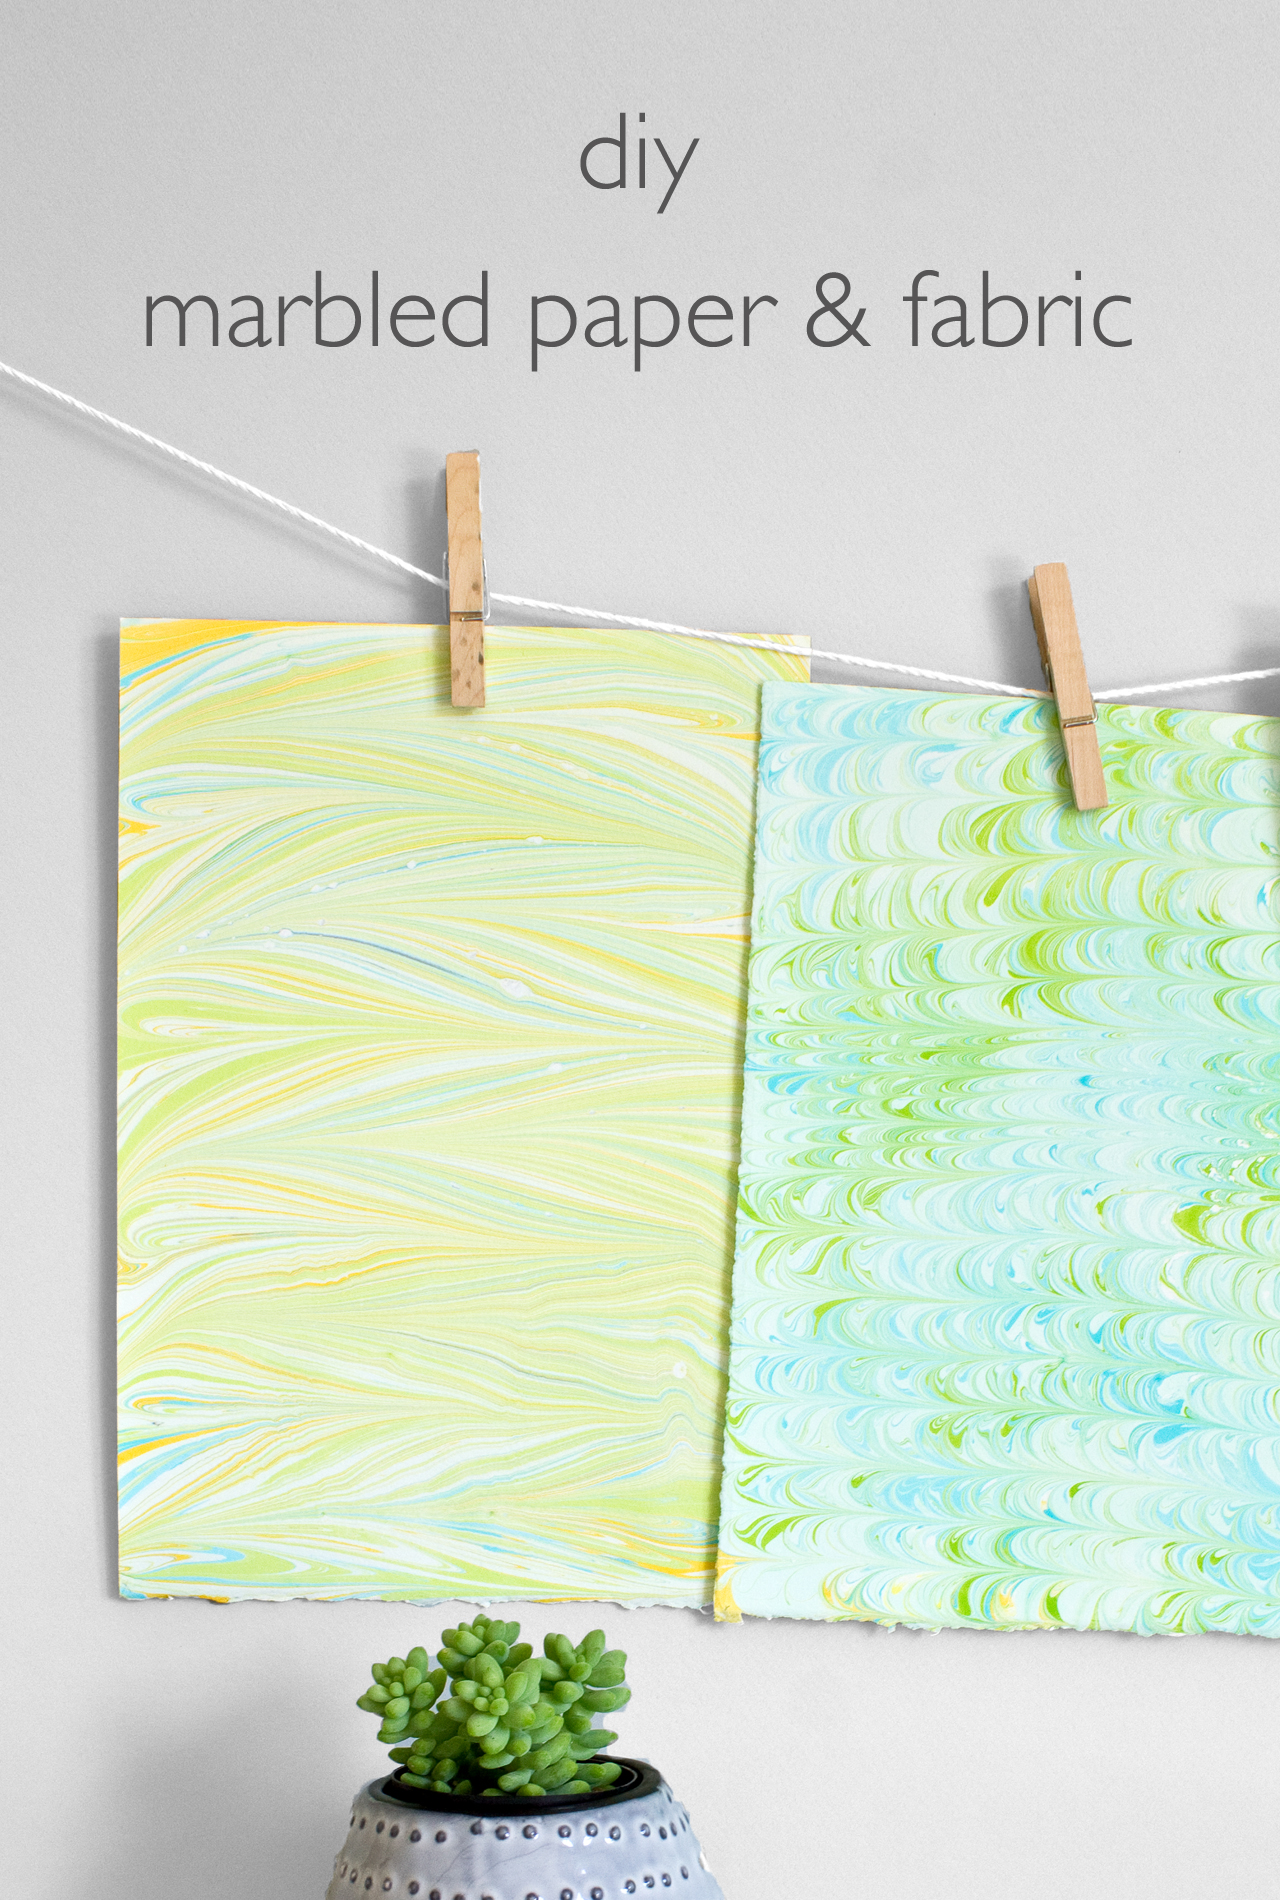
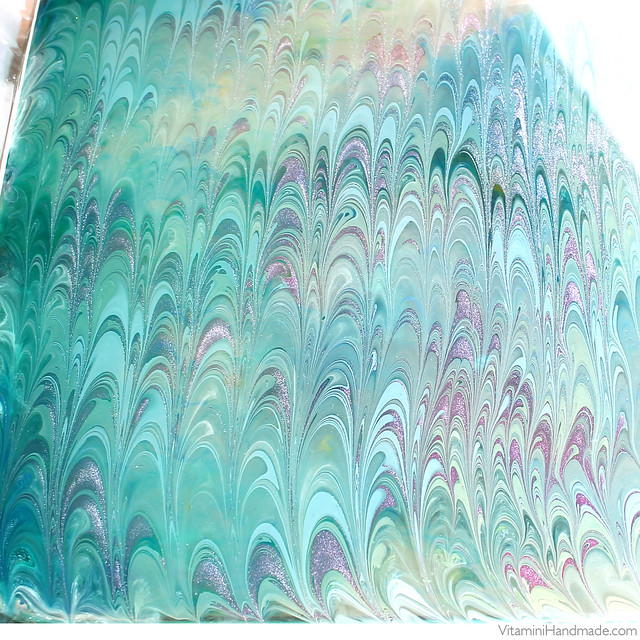
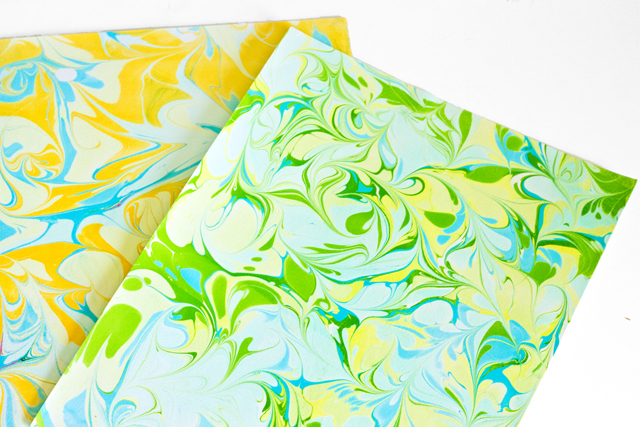
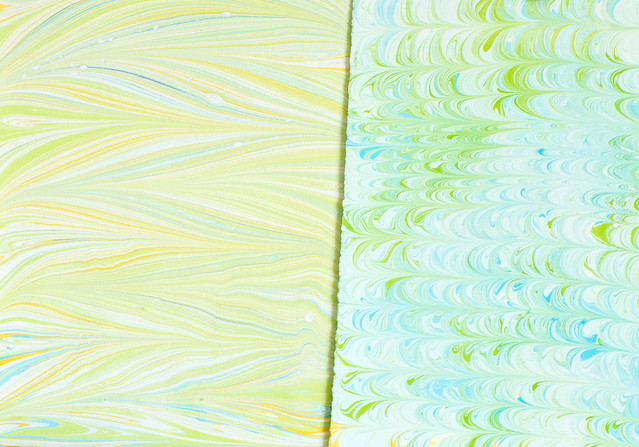
Years ago when I was studying abroad in Italy I remember going into the paper shops and admiring all of the stunning hand marbled papers. They're really just like tiny, intricate paintings. Each one is unique and can never be reproduced exactly the same again. The history of marbling (or marbelizing as some call it) goes way back and has shown up in historical pieces from all over the world! How cool is it that multiple cultures in history interpreted this artistic technique in different ways? Marbling has gained popularity over the past couple of years. You can't open Pinterest without seeing shaving cream or nail polish marbling projects on all sorts of surfaces. This project uses traditional materials and techniques and gives you beautiful results on paper sheets or pieces of fabric. While the steps are more involved than those quick-and-easy projects, this one gives you beautiful, intricate results that get you a little closer to those stunning papers you might have admired in a fancy paper shop.

When I did the marbled Easter egg project last month I also marbled paper and fabric at the same time. It takes some preparation to get everything set up, so it was worthwhile to marble everything at once. This technique is addictive, so if you want to try it I encourage you to have lots of paper or fabric blanks ready to go!


Here's what you'll need:
  • Marbling supplies and tools (as outlined on the Marbled Paper Mache Easter Egg tutorial)
  • Cotton papers cut to the size of your marbling tray. I cut down a large sheet of cotton rag paper that I bought at the art store and also used some Canson 100% cotton sheets that came in 8.5 x 11 size
  • Light colored, natural weave fabric trimmed to size. I used plain cotton muslin and a cotton/linen blend
Don't forget to prep the materials for marbling. For paper, just brush a thin coat of the alum mixture on the paper and let dry. For fabric, immerse the pieces in the alum and let sit for 20 minutes. Wring out and hang dry. Iron out any wrinkles before you start marbling. It's best to do this prep work the night before.

DIY Marbled Paper and Fabric | click through for the tutorial! DIY Marbled Paper and Fabric | click through for the tutorial!

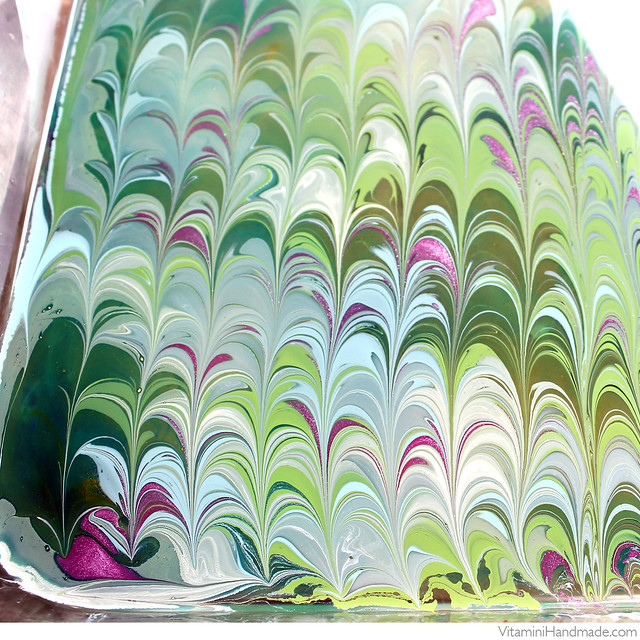
Follow through the same steps as the marbled egg project. Once the paints are ready to go, slowly lay the paper or fabric down onto the surface. Tap the back of the paper/fabric to ensure that it has made contact with the paint. Carefully lift from one end. Lightly rinse with water to remove the methocel and hang dry. Carefully scrape the surface of the methocel with the edge of a paper to clean it off. Any inks that are still on the surface will affect the next design. Once it's clean, start again!

DIY Marbled Paper and Fabric | click through for the tutorial!
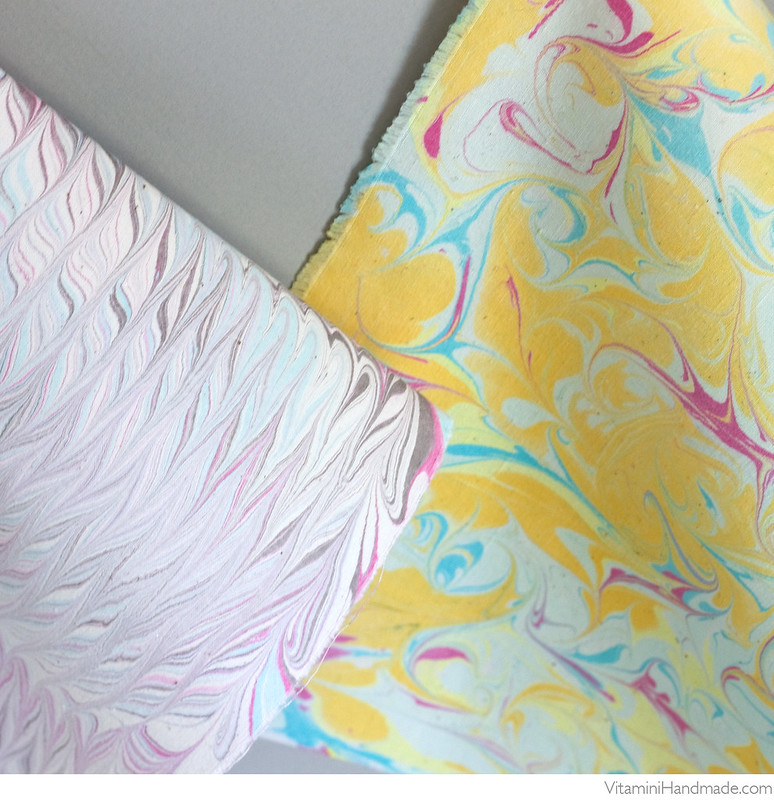
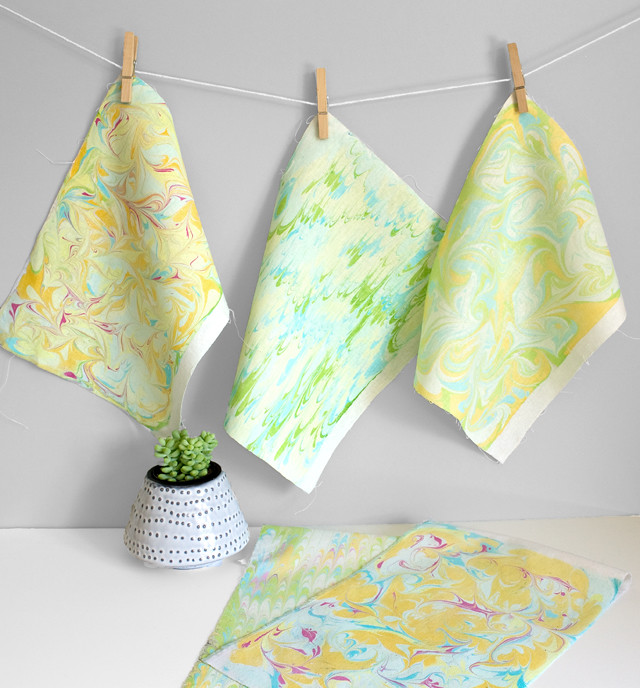
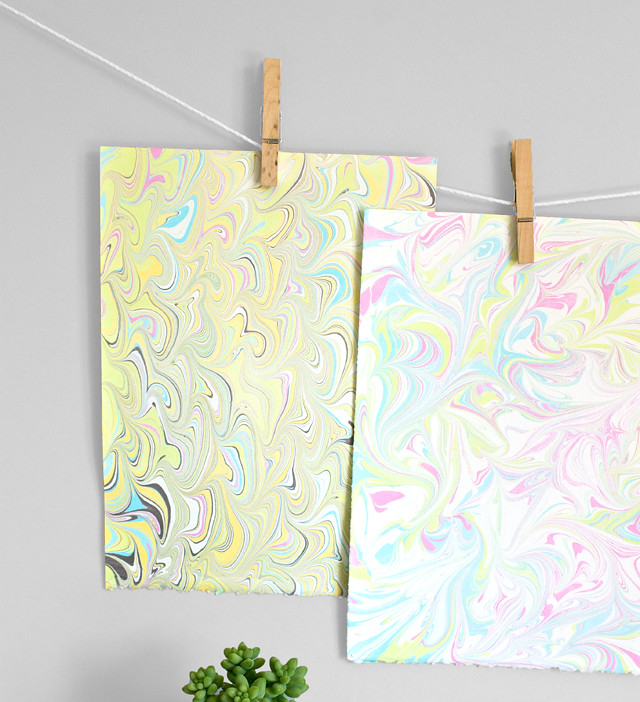
It's interesting to see the variation in colors on the different surfaces. In my experience, the colors were more vibrant on the paper than the fabric. Both the muslin and the cotton/linen fabric held the colors well, but the cotton/linen results were a little more subdued. I had to increase the contrast on the color batches for that fabric, while the paper picked up every tiny little color variation very easily. I'm planning on sharing a few different projects that you can do with the finished marbled pieces, but in the meantime, here's a little gallery of what I came up with.

DIY Marbled Paper and Fabric | click through for the tutorial!
DIY Marbled Paper and Fabric | click through for the tutorial! DIY Marbled Paper and Fabric | click through for the tutorial!

So cool, right?! It's great that these beautiful results can be achieved with inexpensive craft paints. The marbling on the paper pieces is done and permanent as soon as the paper is dry. The paints on the fabric will need to be heat set to become permanent. After they're dry, iron each fabric panel on the reverse side to set the marbling then hand wash in cool water to remove whatever methocel is left in the fibers. Hang dry.

DIY Marbled Paper and Fabric | click through for the full tutorial!

Have a lovely weekend, friends! I'll be at Maker Faire in San Mateo Saturday and Sunday selling with SF Bazaar. Maybe I'll get a chance to sneak away for a little and catch some of the exhibits. If you're there come by and say hi!

Update
Checkout these fun projects using the marbled paper and fabrics created from this tutorial:

DIY Marbled Paper Tray
DIY Fabric & Leather Clutch
DIY Marbled Candle Set

6

Cherry blossom wreath how-to.

Tuesday, March 27, 2012

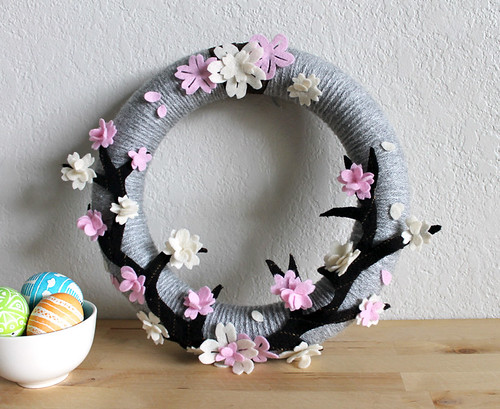
Cherry Blossom Wreath I am totally addicted to making wrapped yarn wreaths! They are simple to make (depending on the level of detail) and can be customized for any season or holiday. The supplies are also inexpensive and easy to keep on hand. I started this one when I was in the middle of packing up my apartment for a move and was desperate to do something creative to maintain a little bit of my sanity. The first day of Spring was just last week, so I wanted to do something to mark the season: cherry blossoms!

Here's what you will need:
Wreath form, 12" diameter  - I used a foam one
Skein of yarn - I used light gray
Felt - Cream, pink, and brown
Embroidery floss - any light color
Wire (optional)
Tacky glue
Hot glue
Ribbon for hanging


Wrap the wreath with the yarn, covering the entire form. I like to do this while I watch tv or a movie. Tie off the ends.

Cut flowers out of felt. I like to cut the felt into squares of varying sizes (about 1.5" to .5") before I cut the actual flowers. This helps to keep them somewhat uniform in size, even though they all come out a little different. Cut little v-shaped notches into the ends of the petals of some of the flowers. Cut little strips out of the center of the larger flower petals.


To make the ruffled centers of the blossoms, gather the petals of a single flower in your fingers and fold it, making the center of the flower a point. Using a needle and your embroidery floss, stitch through the center point a couple of times. Tie the floss in knot and trim.

I made about 36 flowers total. Once all of your flowers are cut and some are stitched, layer a few of the ruffled centers and the flat flowers, gluing them in the center with hot glue.

To make the branches, lay out your brown felt and cut two different branch shapes. You will be covering the branches with flowers, so keep the branch forms simple. Instead of regular felt, I used this felted, pinstripe wool that I had on hand from another project.


To add dimension to the branches, glue wire to the back of the main center branch and a few off-shoots. I couldn't find any regular wire in my craft supplies, so I used picture-hanging wire and it worked just fine! Tacky glue worked really well for attaching it to the felt. Once the glue is dry, bend your wire to give your branches shape.


Now all the components are ready to start laying everything out! Experiment with a few different layouts to find what you like the best. I used larger blossoms at the top of the wreath and at the bottom where the branches come together, to ground the design. I also added tiny felt "petals" and attached them in a random pattern to give the design movement. Wrap the top of the wreath with ribbon for hanging.


Here it is all finished! It was a fun little project and a nice distraction from all of the packing I've been doing lately. I can't wait to hang it on my new front door! Do you love felt and yarn wreaths as much as I do?

(Those Easter eggs in the picture were a project from last year. If you'd like to see how I made them, check out this post.)
 

vitamini handmade © All rights reserved · Theme by Blog Milk · Blogger